tutorials
Showing posts with label tutorials. Show all posts

Saturday, June 27, 2020

Chocolate Blueberry Vanilla Frappucino Recipe


If you let it sits and settle for a while, it will look a lot more blueish in colour and probably because I'm using fresh blueberries instead of thick frozen ones. But this is still really good for a hot humid day

Ingredients:
1. 1/2 cup of ice cubes
2. 1 cup of milk
3. 2 tbsp of sugar
4. 1 tbsp vanilla extract
5. 3/4 cup of fresh / frozen blueberries (I use fresh)
6. 2 tbsp of chocolate syrup (I use Hershey's)


Cooking:
1. Blend all of them and ready to be served cold. Done!

Friday, September 7, 2018

Resipi Kari Ayam Simple

(Hidangan untuk 2 orang makan)


Bahan - bahan:

  • Bawang merah, bawang putih, halia - ditumbuk
  • Kayu manis, bunga lawang, pelaga (Optional, saya tak letak)
  • Cili blend
  • Serbuk kari
  • Ayam (saya gunakan lima sayap ayam)
  • Air (400ml atau secukupnya ikutlah untuk pekat dan pedas)
  • Kentang (Optional)
  • Daun Kari
  • Santan kelapa (Tiada pun ok)


Cara - cara:


1. Masukkan minyak.
2. Tumiskan rempah (kayu manis, bunga lawang, pelaga), bawang merah, bawang putih, dan halia yang telah ditumbuk, sehingga naik bau/sehingga garingan yang sesuai.
3. Masukkan cili blend sehingga pecah minyak.
4. Masukkan serbuk kari yang telah dicampur air (campur air bagi mengelakkan kari mudah hangus). Tumiskan serbuk kari ini sehingga pecah minyak dan menjadi pekat dan kemerahan.
5. Masukkan ayam, dengan api sederhana, biar seketika (boleh tutup) supaya rasa penetrate dalam ayam.
5. Masukkan air mengikut selera masing - masing, saya letak sedikit sahaja air sebab nanti nak letak santan.
6. Masukkan kentang dan biar sehingga lembut sikit.
7. Boleh masukkan daun kari. Daun kari letak bila - bila pun boleh, time tumis dengan minyak pun boleh.
8. Masukkan santan dan biar sehingga mendidih. Yang ni optional, ada orang tak suka letak santan.
9. Perasakan dengan gula dan garam. Sedia untuk dihidang!


Friday, February 1, 2013

DSLR Slider TEST!

I'm posting 2 posts in the same day, just different few minutes from previous one. That's awkward, but the reality is,
just now I went hangout with my friends. I'd planned to send those text books back to school but I'm late and I know it. So I just go through and just hangout.
I just came without reason?! No doubt, never wonder, I got spent by Maslina that's why I came.

( Just in case the thumbnail would be my face no I don't want )


I really love it when my friend, Thunder and I used to eat
with a pair of chopsticks! :D

Thank youuu. :3


Alright,
I didn't post how did my slider looks like. But since I haven't change the 4 x 1 wooden block yet, I'm not going to post the looks. Haha but I'm going to post it in terms of this TEST!
Now let's see,

I took this picture when I was looking for the location,
it looks naturally beautiful. Haha.

The location.

I take this picture with higher shutter speed that's
why it looks darker.

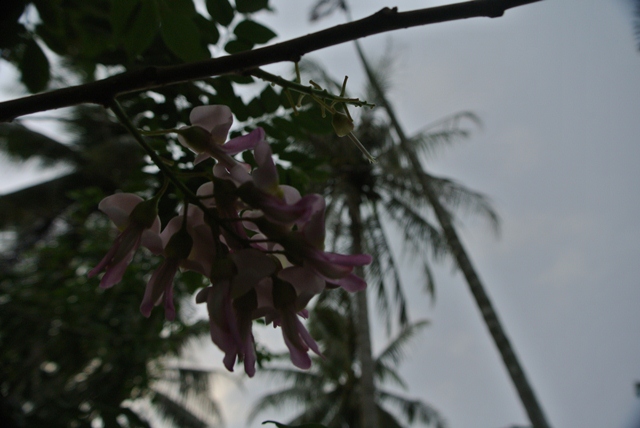
This picture looks like Sakura flower.

Even though I never seen Sakura on my face.
But I know the color. Pink.

Again. Manual.

Still Manual.

Okayy.

Yes.

Next location in portrait.

What you can see in the video.

Next location.

I prefer this place because it looks like autumn here.

Yup, the looks is now revealed.

This is the main place I used to plan.

But then, I saw many beautiful places, then I spread out recording there. (Just three locations anyway). -_-

DIM (Do It Myself) DSLR Slider

It shall be DIY DSLR Slider.
But nevermind. I'm going to make it myself.
Before that, I tried to master the camera's Shutter, Aperture and ISO 1st. I took these photos and many more for test.

Shutter 1/40
Aperture F/5.6
(I'm not sure but I guess).

My sister's cook book. I love that vintage pillow.
I've changed the definition of these photos to 640 x 480 because I'm afraid it's gonna be to large.
So after I can understand a bit, now it's time for me to create my own slider.

So now, I'm going to prepare things for it first.

1st thing, I cut everything into my preferred length.
The results are these.

A pair of 1 x 1 woods with length...
As same as the width of 2 x 1 wooden block.
(Please continue reading and you'll understand).

A pair of 1 x 1 also.

Also, a pair of 1 x 1 but in different length. For what?

Here how it is going to look like.
(I made it square because my mount bolt is square,
depends on your mount bolt).

This is for the "mount bolt on your tripod to make your camera stick on the tripod as shown in picture below" to place onto. But if you have the original mount bolt (I mean you bought it specially for this slider), just drill it into the 2 x 1 wooden block. Don't need to do this. What for does 2 x 1 wooden block? Just continue reading. :D

Can you see that black square thing? The silver screw thing in
it I call it mount bolt.

Now here is the 2 x 1 wooden block.

Wire case.

4 x 1 (I guess) wooden block.

Plan.
Now you can see where's those things are.
Then, I paint them. I use black and white.

Sprays.

The result? Just wait in the next post. But I guess I'm changing the 4 x 1 wooden block.
Because it looks so bad. I'm planning to change it to better look one.

© AQILAH ALI
Maira Gall